Getting started with something new is very difficult, especially with a niche topic like commentary in sim racing. To make things easier, I’ve decided to write a guide on how I would start broadcasting commentary if I had to start all over again. This post will include hardware and software options, preparation ideas, a few points of interest to help you stay organised, and, of course, tips on getting the job. It’s gonna be a long one, but I wanted to make sure I covered everything you might need to get started!
Index
Before the Broadcast
The most important part of any successful broadcast is the right preparation. Getting the scenes right, making sure the audio is properly routed, and muting yourself during the intro, to name a few. The only problem is that you can’t start a broadcast without having the job. So let’s start there.
Getting the Job
The most difficult part of getting a commentary job is finding one. Even though there are plenty of leagues out there, if you’ve seen anything from them, chances are it’s from a broadcast, meaning they already have a commentator in place. This makes it very difficult to find a league to get your spot as a commentator. But just because it’s difficult does not mean it’s impossible.
Finding a commentary job
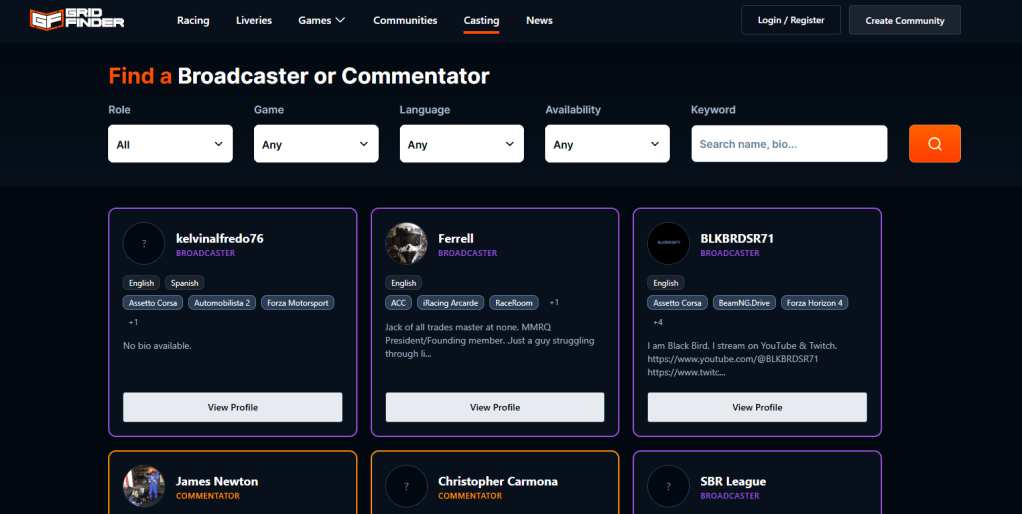
Source: Find a Broadcaster or Commentator | Grid Finder
Luckily, there are a few places where you can find commentary jobs. One of which is Grid Finder. Although Grid Finder is mostly a community where you can find leagues to drive in and to promote your own leagues, they also have a special Casting page that helps leagues find a commentator and commentators find a job. Their Discord server also has a few channels for leagues and commentators to promote themselves, making it easier for both parties to link up and create their broadcasts.
If the Grid Finder search proves fruitless, don’t lose hope. You could always go to other league hosting sites like SimGrid or Simracing.GP. These communities have lots of leagues running, and most of them don’t have a broadcast. If you’re just starting out, it might be worth helping one of these leagues get themselves out there by volunteering to broadcast their events.
Communication
Once you’ve found your client, you can start talking! Not only about the obvious parts like planning, but also about the league. Make it a habit to know some stuff about the league: regular drivers, rulebooks, ongoing rivalries, etc. The more you know, the more you’ve got to work with during the broadcasts.
Besides knowing the league, it’s good to know the drivers as well. The best contact comes in the form of driver interviews, but not all drivers are open to a talk after a race. That’s why a league’s Discord server is a great way for you to ask questions in general or aimed at a specific driver or group of drivers. Once again, the more information you get, the more you can talk about during a race.
Payment and rates
Before I get to the juicy bits, I want to manage your expectations a bit. When you’re starting out, chances are you’re not going to get paid at all. Most commentators do it for free, meaning leagues will gladly skip a costly commentator to find a volunteer, even if it means giving up the quality you’ve worked so hard to build up. I say most, not all. Which is why I’m covering it in this post anyway.
Making this website has helped me refer my potential clients to the rates I’ve set beforehand. This shows transparency and gives the client something to talk about with their admin team. Besides that, I usually give clients an estimated invoice to let them know what the cost would be with the current agreement. Sometimes, clients will alter their wishes in order to save money, which needs to be communicated. Rather do it before the race than after.
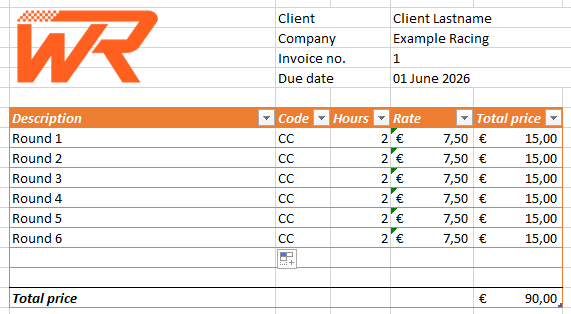
This is an example invoice I send to my clients. It has the description of the rounds, together with the code of the service they’ve ordered, the length of the broadcast, the hourly rate, and the total cost for that round. The codes and rates are also available for the client, giving them full transparency.
I don’t say all these things to sell myself, but more to give an example of how to properly communicate with clients, as I’ve received very positive feedback on my transparency and communication. Good practice makes perfect.
Hardware
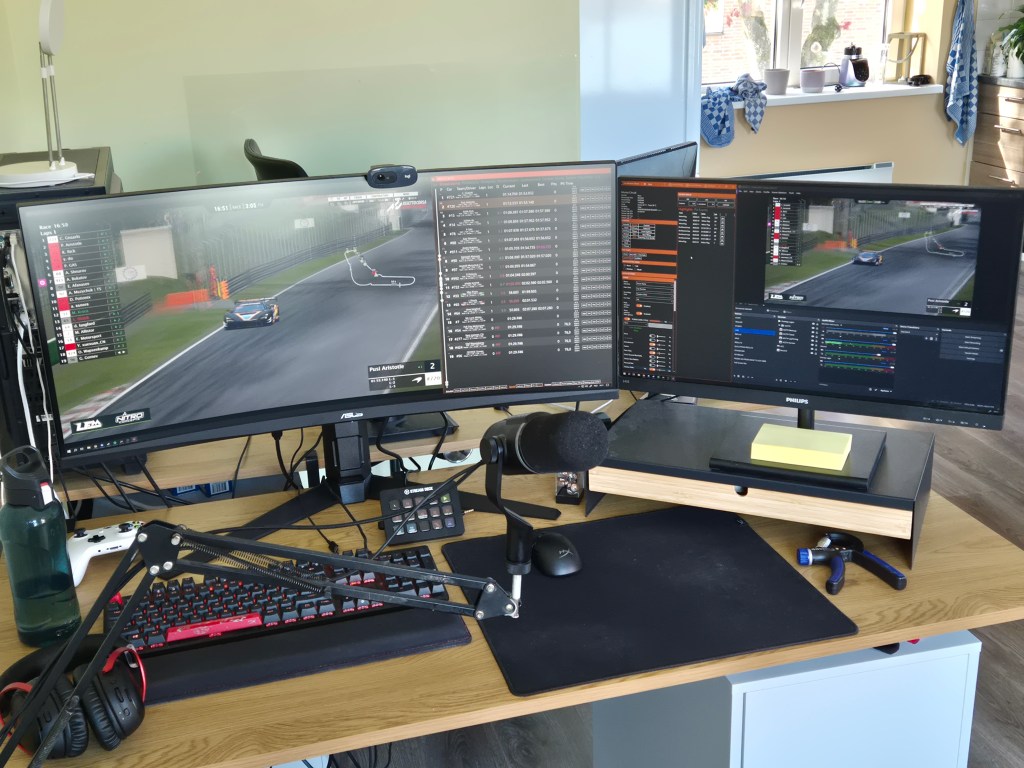
Before you even think about setting up the broadcast, make sure you have the right materials. Getting a PC that’s up to spec, some decent audio equipment, and maybe some fluff pieces to help you manage your broadcast. In this part of the guide, I’ll show you what pieces of hardware I personally use.
Don’t feel pressured to get the exact same pieces for your setup! There are plenty of other options that will work just fine. Just remember, in order of importance, it’s PC first, microphone second, headphones third, everything else last.
PC
If you’re already racing yourself, you might not need this part of the guide, as you’ve most likely already got a PC beefy enough to run the simulators. Just make sure to check if your machine can run the game and broadcast at the same time, as this will ask a bit more from your components compared to just running the simulator.
If you don’t own a PC, or just one that’s not going to be strong enough for broadcasting, there are a few things you can do to check which components you’ll need. One of these things is checking the system requirements for the game in question.
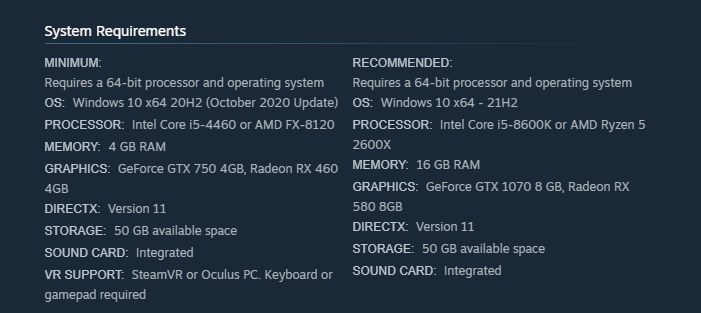
Source: Assetto Corsa Competizione | Steam
The minimum requirements are usually set in place to show you what you absolutely need to even boot up the game and run it at its lowest settings. The recommended settings are a better indicator of what you need to have some quality while running the game. Add broadcasting into the mix, and you might want to look at an even newer, better version of the components listed.
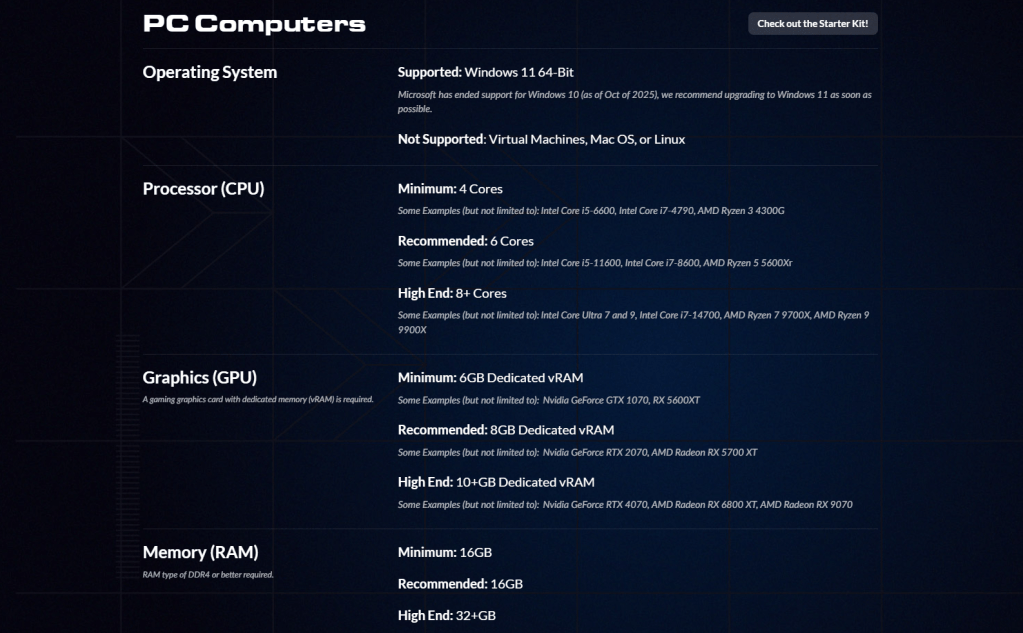
Source: System Requirements | iRacing
A good example is the iRacing system requirements page. It shows a Minimum, Recommended, and even a High End option. If you want to make your broadcast look the best it possibly can, the High End option might be your pick. If that’s out of your budget, don’t be afraid to broadcast on a lower quality! My PC isn’t the strongest it can be as it’s got a very outdated CPU installed, so sometimes I’m forced to lower the quality in order to get the right framerate. Does this lower the image quality? Sure, but my commentary won’t get worse from a few pixels less on the screen.
Audio
To make sure the audience can hear you, you’ll need a microphone. This is arguably the most important piece of your equipment, besides the PC, as the quality of your commentary partially depends on your microphone. The better your microphone, the nicer it will sound on the broadcast. However, if you’re using a headset, and your friends haven’t told you it sounds like a garbage can yet, you can still use that to provide high-quality commentary. Besides that, a headset is usually a cheaper 2-in-1 option compared to a standalone microphone. Neat!
Just as a disclaimer, these next options aren’t the products you should go for, but I’d like to mention my current personal choices in case you’d like to mimic the sound and feel of my broadcasts. No pressure.
Microphone

Source: FlipCast – Streaming XLR/USB Dynamic Microphone | HyperX
For the microphone, I’ve opted for the HyperX FlipCast. This microphone is a dynamic microphone with the options to connect via USB or XLR, making it perfect for the long run. When you’re starting out, you can plug the microphone directly into your PC using a USB cable, and when you’re upgrading to an audio interface, the XLR option will provide. The price is a bit steep at €230, but it’s definitely worth it as it sounds incredible. Other popular options include the Blue Yeti, priced between €90-140 depending on the store, and the HyperX SoloCast 2, priced at just €50. I personally can’t recommend either, as I haven’t used them, but they definitely look the part.
Headphones
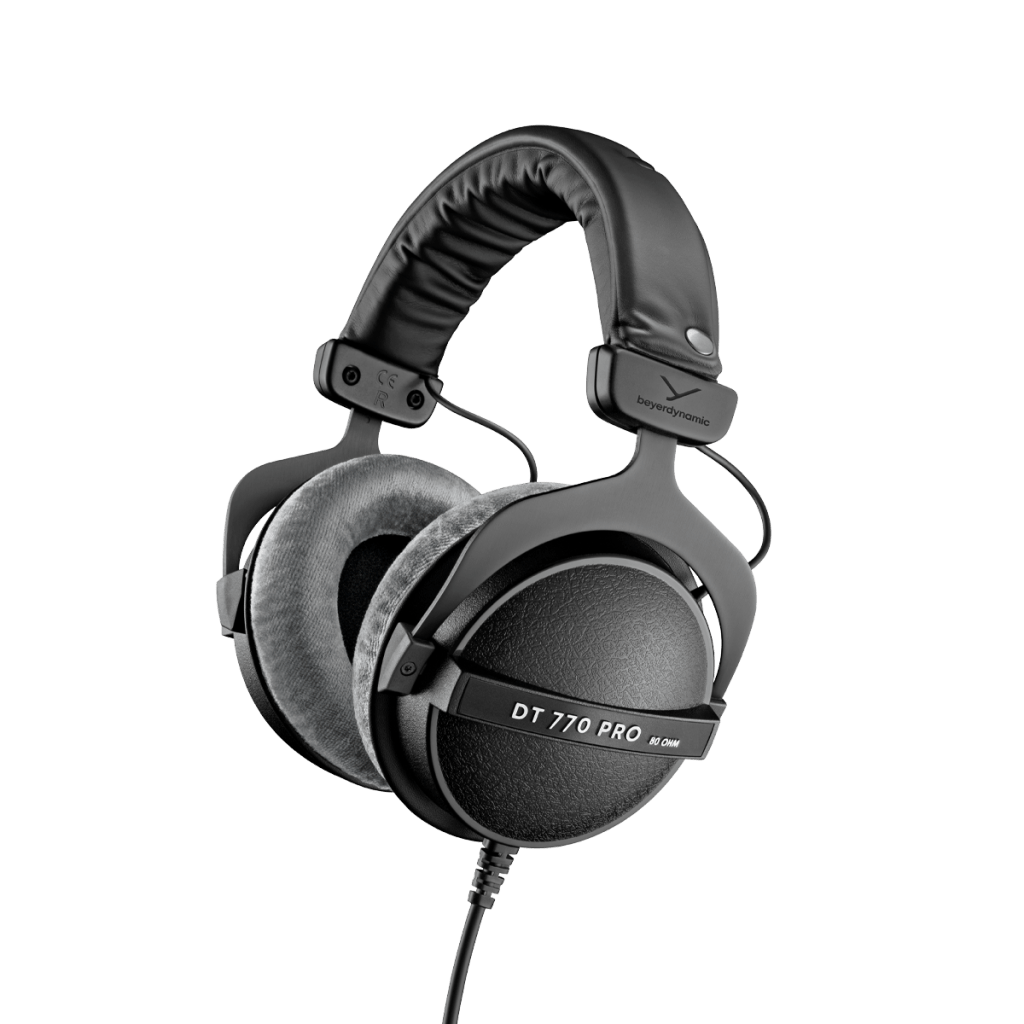
Source: DT 770 Pro: Closed studio headphones | beyerdynamic
A few years before I started doing commentary, I bought this pair for €130. Currently priced at €160, the Beyerdynamic DT 770 Pro is still my go-to pair of headphones for commentary, even though I use a gaming headset for everyday PC use. While you don’t need this quality, it is nice to hear everything and pick up on the smaller bits that might not be audible on cheaper options. Then again, you could choose the €2 wired earbuds and no one in the audience would know, so pick whatever fits within your budget.
Headset

Source: Cloud III Wireless | HyperX
If you’re looking to buy a headset, the HyperX Cloud III Wireless is a very good option. A headset also helps to keep the sound and volume of your voice consistent, as the microphone moves around with your head. This gives it a one-up on the standalone microphone, but you’ll pay for that in terms of quality. Priced at €150, this headset might just be my favourite in terms of headphones and microphone quality combination.
Stream Deck (Optional)
To make sure every transition goes smoothly and on time, I’ve been using an Elgato Stream Deck for the past few months. The Classic version, priced at €170 on their official website but available for as little as €130 locally, has 15 keys, all programmable to do whatever you want your software to do. For me, I’ve linked most buttons to OBS, making sure I can swap scenes and toggle sources without needing to navigate the software’s layout.
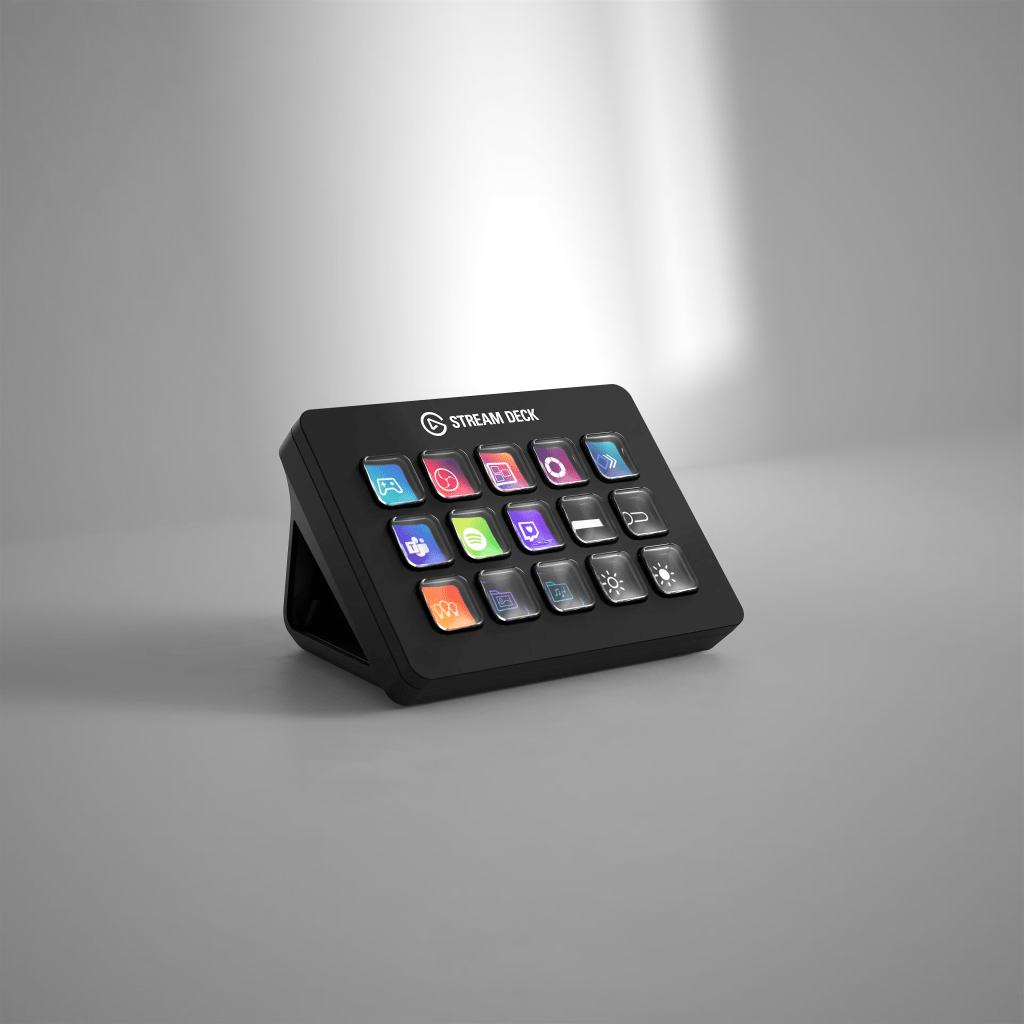
Source: Stream Deck | Elgato
The Stream Deck (or any other equivalent) is not necessary for a good broadcast. It took me years of doing commentary before I decided to get one, but it’s definitely improved the quality of my broadcasts. If you’re only looking to do commentary, a Stream Deck is probably the one item you’d want to skip, as you don’t need too many buttons for speaking.
Software
Now that you’ve got your hardware all set up, it’s time to take a look at software. There are a few things you can choose from in terms of broadcasting software, but ultimately it all comes down to preference. Some simulators also offer special applications or plugins that help you navigate the spectator mode, so I’ve listed the ones I’m familiar with further down.
Broadcasting Software
To start broadcasting, you’ll need broadcasting software. The 3 most popular choices are listed below, but don’t be shy to look for some alternatives if these aren’t to your liking! As I’ve tried all 3 options, they are listed below in my order of preference. Regardless of your choice, it’s still a software. The options will be different, but the main functionality is the same: broadcasting.
OBS
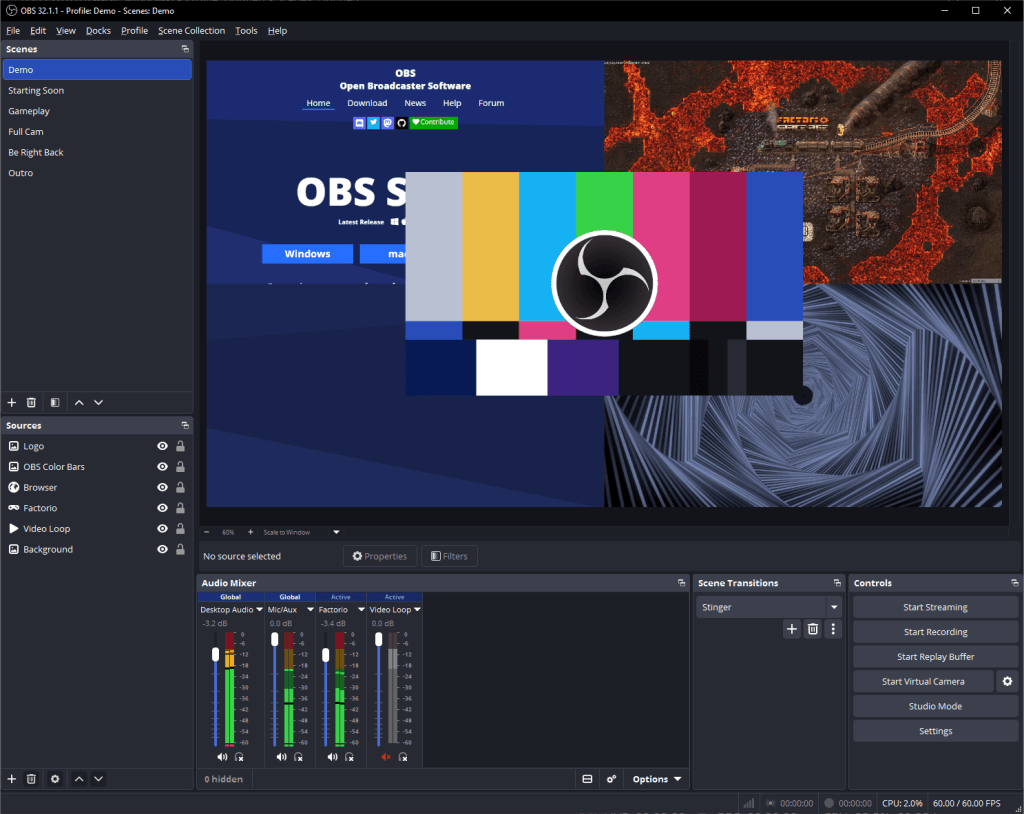
Source: Open Broadcaster Software | OBS
Open Broadcaster Software, or OBS for short, is my personal favourite. It’s basic in UI, which makes it all the more appealing to me. But don’t let that fool you! There are plenty of settings to mess around with to get the perfect broadcast quality.
The biggest appeal for me is the ability to easily switch between scene collections and profiles. That way, I can broadcast to different platforms and load scenes from different clients very quickly. The audio routing is very nice as well, allowing for better audio editing once you’re done with your broadcasts.
Streamlabs
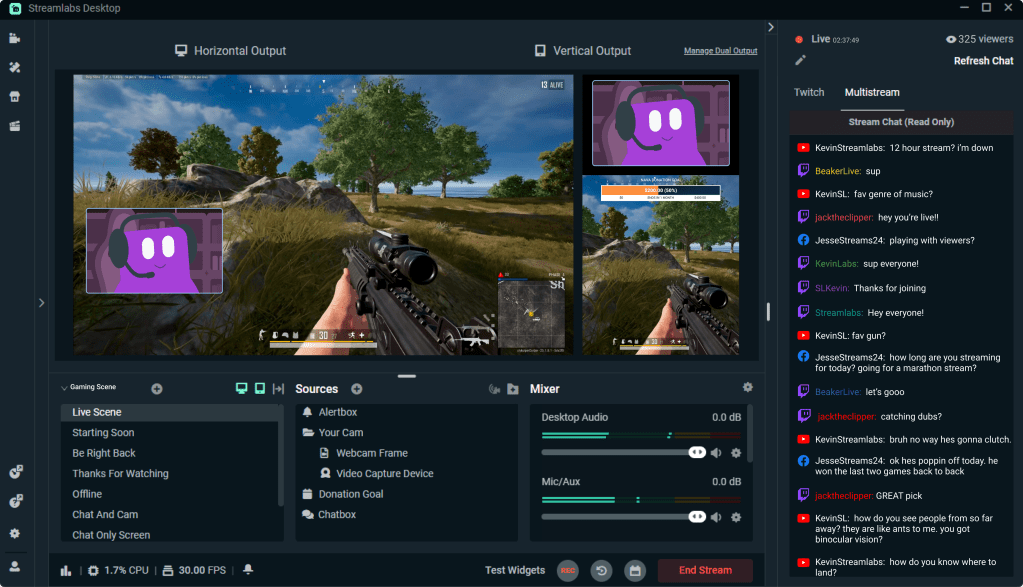
Source: Free Live Streaming & Recording Software | Streamlabs
Streamlabs has its good and bad sides for me. In a lot of ways, it’s very similar to OBS, making it easy to switch between the two if needed. The thing that puts me off is the clunkier UI. Everything just feels a bit bigger in Streamlabs compared to OBS, making it less appealing for me to use.
Besides that, Streamlabs might have the best integration with your favourite platforms. Where OBS relies on browser sources, Streamlabs has built in widgets to help you get the right things on screen at the right time.
XSplit
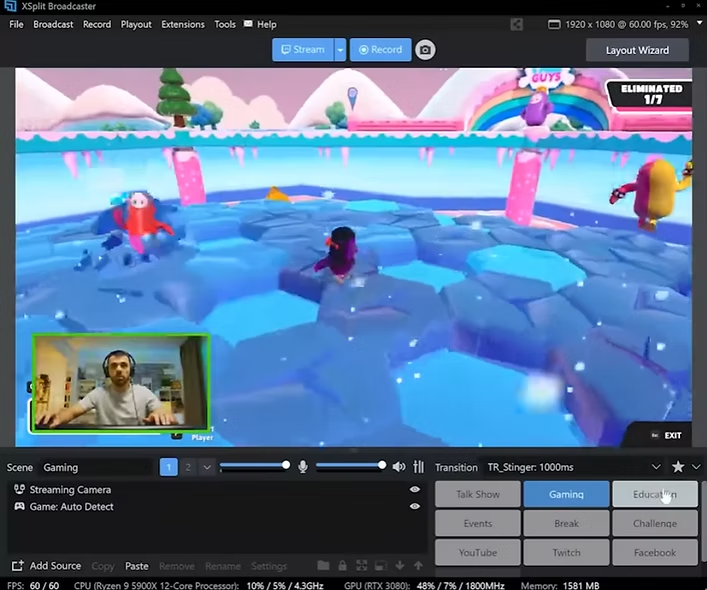
Source: Live streaming and recording software |XSplit
XSplit is the software I have the least experience with. I’ve used it a tiny bit back in the day when someone recommended it to me, and I couldn’t be bothered to search for other options. It worked exactly the way it needed, but I haven’t opened the program in 10 years, so I’ve got very little to say about it other than try it out for yourself!
Spectator Software
Some racing simulators have special software to help you navigate the spectator mode. This makes it easier to navigate the camera and the HUD without needing to learn a lot of shortcuts. The applications listed are specifically for Assetto Corsa Competizione, which I have the most experience with. Assetto Corsa has plenty of mods and plugins available, but sadly none I can tell you about. I unfortunately don’t have enough knowledge about the other simulators, but it might be a good idea for a future post!
ACC TV
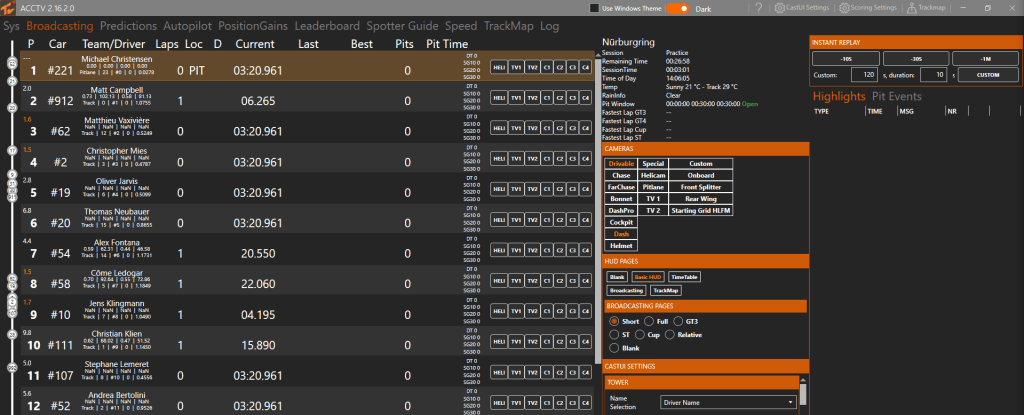
Source: ACC TV
Our first option is ACC TV. This piece of software is something I cannot go without anymore after using it for about a year now. I used to use ACC Race Control (shown further below), but stepping up to ACC TV has given me so much more to play with. The main menu of ACC TV has everything you’ll need to control the camera. On the left are the standings, complete with driver name, car number, lap count, and lap times. Next to that is the UI editor, which has some options to change the live timing tower and cameras. On the right, there’s the option to go into the replay with a full list of incidents and yellow flags. It might look overwhelming at first, but it’s very usable once you get used to it.
The only downside is its price, starting at €6/month the regular subscription and €10/month for the pro subscription. Luckily, ACC TV offers a lifetime access for €120 and €190 for the regular and pro versions, respectively. A hefty price, but definitely worth it if you’re broadcasting ACC regularly.
ACC Race Control
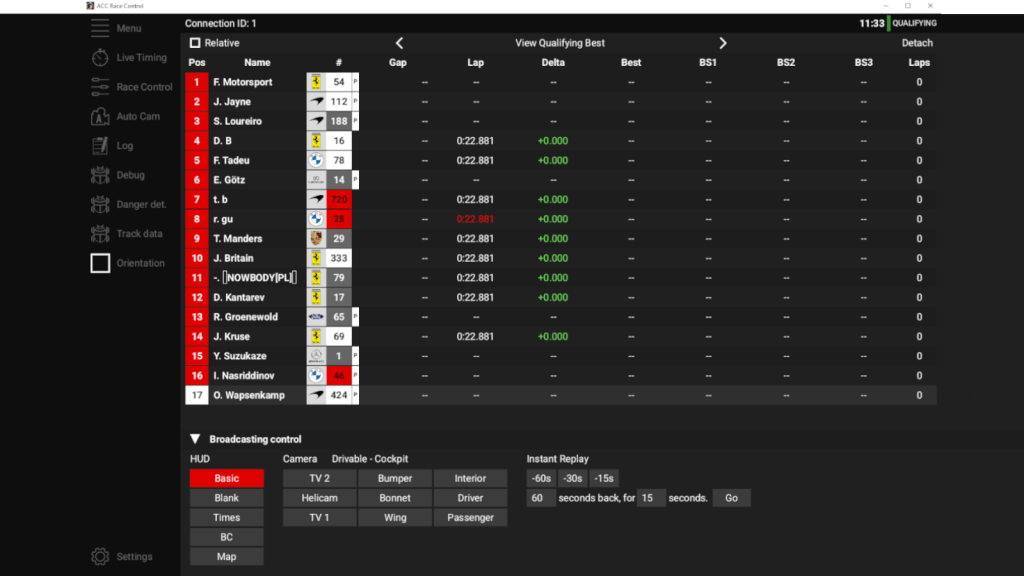
ACC Race Control looks like a simplified version of ACC TV, and it also feels that way. To me, ACC Race Control is perfect for beginners because it’s entirely free! The updates stopped over a year ago with the release of the GT2 class and the Ford Mustang GT3, but that doesn’t stop the application from working with the latest version of ACC.
The main screen has everything you need: HUD and camera controls, information on the drivers, and replays. The driver list can be adjusted for the different needs of each session. The race view has more information about pit stops, whereas the qualifying view gives you all the sector times for each driver. Overall, a great choice to start with if you’re starting your broadcasting in ACC.
Taking Notes
Before starting any broadcast, I try to fill up my trusty notebook with the most important information, like event format, current standings, and championship rivalries. For me, a notebook helps me stay organised before a race, and it’s easier than having three other tabs open to scroll through during the broadcast. A digital notebook is also handy, in case you prefer that. Below is an example of a page out of my notebook.
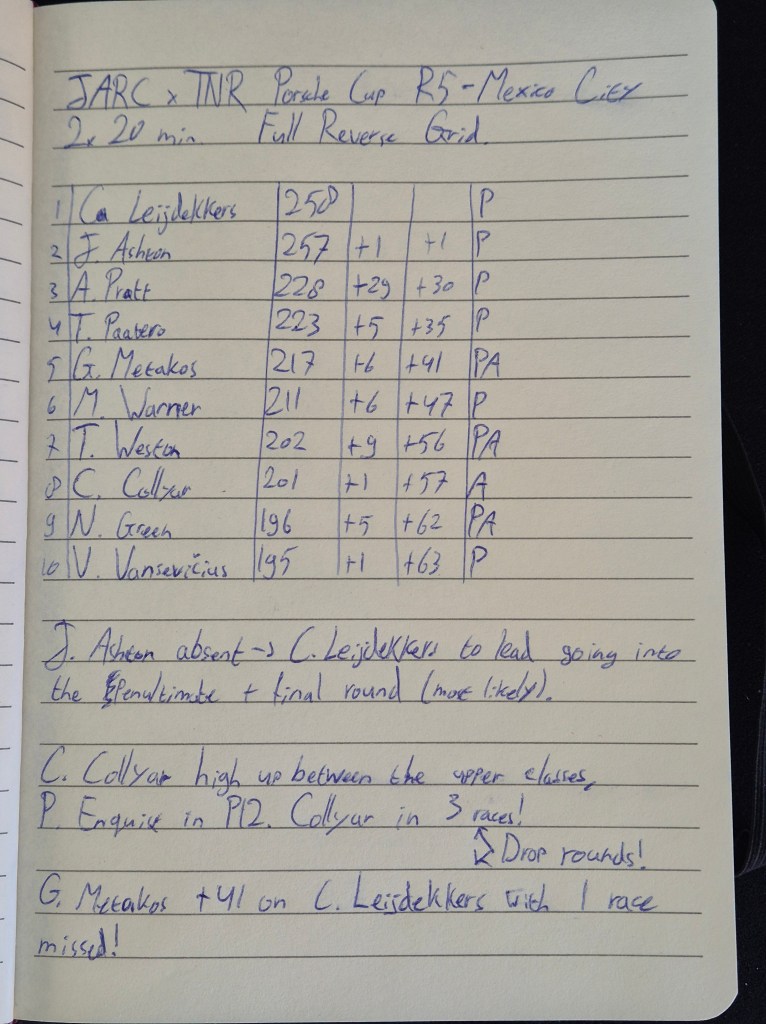
At the top, I’ve noted down the series, round, and track, just to give myself a reference when I’m looking through my previous broadcasts. Below that is the event format with the added information of the second race being a full reverse grid. After that, I’ve added the standings with the point gaps and the class for each driver, P meaning Pro and PA meaning Pro-Am. The lower third is filled with a few points to mention regarding the championship, making it easier to keep the audience up to date with the battles.
During the Broadcast
Because there are so many things to cover for a broadcast, I’ll leave that for another day. This post is about getting started after all, and the only thing you’ll need to do is talk! That doesn’t mean I won’t give you a few tips on how to get started.
What to say
When I start a broadcast, I usually have the classic “Good evening, and welcome” talk where I introduce the event that’s going to be held. This is the intro I created for myself on the spot, and I’ve stuck with it since then. No thought went into it besides “yeah, that sounds alright”. Then it’s on to the calendar, standings, and prizes. After that, it’s time to go to the trackside pictures and start the event!
The main focus of the commentator should be the main or play-by-play commentary (explained further below). Whenever something happens, describe it to the best of your ability without going into too much detail. A few examples:
Bad:
“Keser as well, out of the final corner before the straight, and we see Nitro taking a little bit more space towards the inside, so he doesn’t go fully to the outside, which means that he is looking to go a tiny bit more defensive than before.”
This is quite the sentence. It’s taken from one of my earlier solo broadcasts for PitSkill.io, where two drivers were fighting for a few laps already, and it looked like it got closer to an overtake every single lap. The problem is that I’m mentioning the tiny bits and pieces of strategy that not everyone wants to hear about when there’s a battle going on. These things are better left noted at first and talked about later.
Good:
“He’s got the opportunity, he’s got the run. The inside is open for turn 1, doesn’t go for it, brakes super close, and that’s pure racecraft. There’s Brennum outbraking himself a tiny bit, going off the track and opening up for Picano, who is now through. Brennum drops back, Pagliai through as well.”
Now obviously there’s a bit more action going on here, but I’m only describing what’s happening and what the audience can see instead of talking about a driver’s thoughts. Mention what you see as it happens, and think about the thought process after. This gives a clearer separation between the play-by-play and the colour commentary (also explained below), making it nicer to listen to for the audience.
Co-Commentary
Don’t be scared to team up for your first broadcast. You can learn a great deal from others while watching, but even more when working together. Co-commentary isn’t necessarily easier compared to solo commentary; it’s just that the difficulties lie in a completely different place.
Roles in commentary
In commentary, you usually have two different roles: play-by-play/main commentator and colour commentator. As a solo commentator, you do both of these roles by yourself, easily switching between the two without necessarily knowing where one role ends and the other starts. When co-commentating, you have to know when to talk and, more importantly, when not to.
The name “play-by-play” comes from sports where each play shown on screen gets mentioned by the commentator. This makes sure that the audience knows exactly what’s going on, even if they don’t know anything about the sport. Whether it’s a driver making an overtake or a pair of cars coming together, the play-by-play commentator will mention whatever’s on the screen and is usually the voice that gets the most excited. Because this takes up the majority of the broadcast, the play-by-play commentator is also called the main commentator.
If there’s a space between the action, it’s up to the colour commentator to fill the gaps. They’ll mention the bigger storylines in the race, insights into why a certain move did or didn’t work, or even offer technical information about the cars. As the name suggests, the colour commentator gives the broadcast a bit more colour by talking about the things that aren’t visible on the screen. Once the action picks up again, the play-by-play commentator will take over again.
Working together
Once you’ve gotten a feel of what each role entails, be sure to communicate your preferences with your co-commentator. That way, each voice gets its own role, making it a bit easier for the audience to follow who’s who. If you’re still unsure, that’s okay too! Ask your co-commentator to switch between events to see what role you like best. Some commentators swear by one singular role, but most can provide both types of commentary.
After the Broadcast
A commentator’s job doesn’t end when you stop the broadcast. There are plenty of actions you can still take to improve your craft, like rewatching your broadcasts to scan for any mistakes and areas you can improve on. Because I can’t put a full analysis in this post (maybe in the future?), I’ll skip the review, but a few other points of interest are noted below!
Engagement
The final step to a good broadcast is being active in the community. It helps to show your face after events to let the drivers know you are not just a voice-for-hire, but an actual part of the community. It also gives you a good opportunity to read through some of the issues the drivers were facing during the race, which gives you more talking points for the next broadcast!
If the event you’re broadcasting is just a one-off event, you can always talk with some people in the days before the event to get the information you want for the race. Don’t be shy to ask around! Maybe some hidden rivalries are going on between drivers who have been participating in plenty of similar races.
File Storage
If you’re planning on broadcasting a lot, it’s good to have a system in place to manage your files. Free online storage is very limited, except for YouTube uploads, which can limit some of the video quality, so the best choice is to buy local storage. With 4TB HDDs being available from around €120, they will last until you’ve hit well over 1000 hours of broadcast. You won’t need an SSD if you’re planning on just storing the videos, so the higher price tag might throw you off a bit. For reference, the €120 that will give you 4TB of storage on an HDD will only give you 1TB on an SSD. Something to consider.

My personal storage looks something like the image above. Even though I’m European and enjoy the DD-MM-YYYY format, I start off with the YYYY-MM-DD format for easier sorting. After that, I specify the host or client, followed by the series, round, and track. This way, I never get lost in my own files, and I can find whatever I need at a moment’s notice.
Final Thoughts
And that’s that! Hopefully you’re now ready to start your commentator’s journey! And no, before you ask, I’m not getting paid to mention the products shown in this post. Not that I wouldn’t be open to a sponsorship. HyperX, hit me up.
This post is one that I’ve been wanting to write for ages now. I’m very glad I’ve taken the time to sit down and put it on paper. There is a lack of images in some parts, but that’s just because I do not have a physical booth to get images from. I do commentary solo at my desk and duo over the internet, making it very difficult to get action photos. Even so, I’m still proud of this piece.
If you’ve enjoyed this guide or felt like this helped you to start (or improve) your commentary journey, let me know! I’m always happy to help people get started in the scene and improve their craft, so I’d be happy to answer any questions that I’ve left unanswered in this post.
Thank you for reading, and hopefully I’ll see you again soon!


Leave a comment